> ## Documentation Index
> Fetch the complete documentation index at: https://docs.flowripple.com/llms.txt
> Use this file to discover all available pages before exploring further.
# Creating HTTP Actions
> Step-by-step guide to creating and configuring reusable HTTP Actions with input variables, authentication, and output mappings.
# Creating HTTP Actions
This guide walks through creating an HTTP Action — from basic configuration to testing and output mapping.
**Prerequisites:** You need a Flowripple account and at least one project.
## Creating an HTTP Action
In your project dashboard, go to **HTTP Actions** in the sidebar navigation.
Click the **"Create HTTP Action"** button to open the creation form.
Fill in the basic info, request configuration, input variables, and authentication as described in the sections below.
Use the test panel to run a test request with sample input values.
Click **"+"** on values in the test response to create output mappings.
Click **"Create HTTP Action"** to save. The action is now available in your workflow builder.
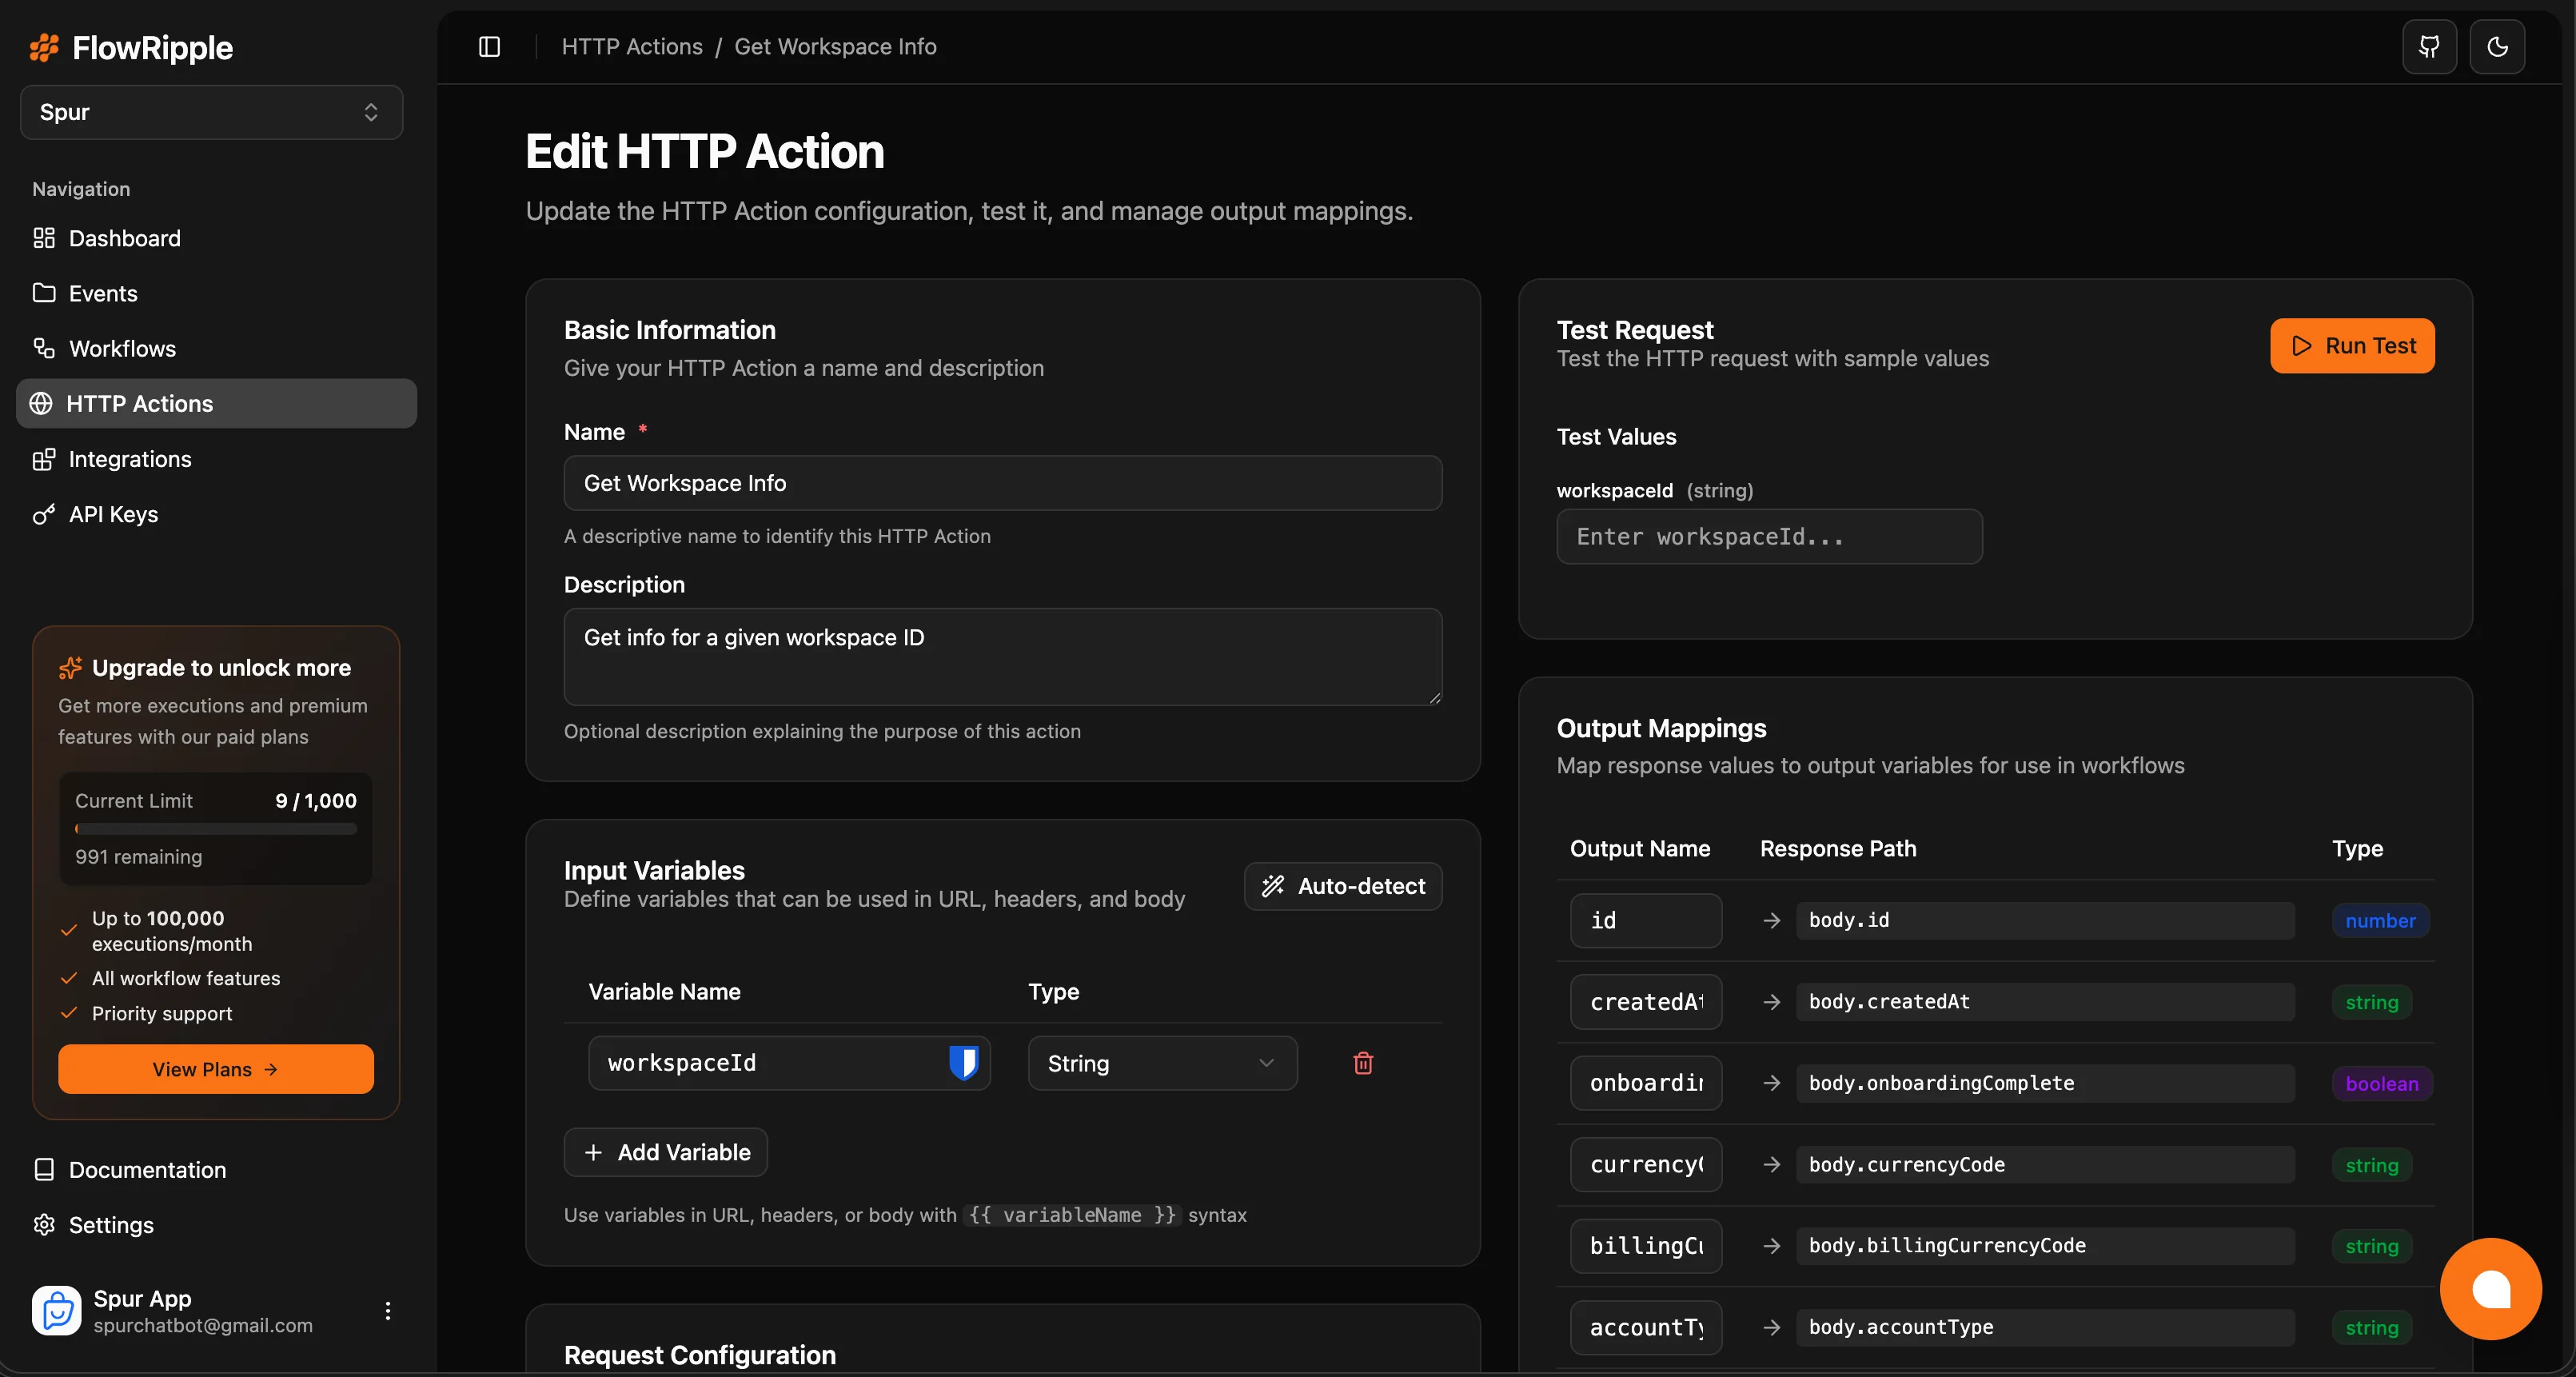 ## Basic Info
Configure the action's name and description.
| Field | Required | Description |
| --------------- | -------- | ------------------------------------------------------------------------------ |
| **Name** | Yes | A descriptive name (e.g., "Create Stripe Customer", "Send Slack Notification") |
| **Description** | No | Brief explanation of what the action does |
## Request Configuration
### HTTP Method
Select the HTTP method:
* **GET** — Retrieve data
* **POST** — Create resources or send data
* **PUT** — Replace resources
* **PATCH** — Partially update resources
* **DELETE** — Remove resources
### URL
Enter the full endpoint URL. You can use input variables in the URL:
```
https://api.example.com/v1/users/{{userId}}/orders
```
### Headers
Add key-value header pairs. Both keys and values support input variables:
```
Authorization: Bearer {{apiToken}}
Content-Type: application/json
X-Custom-Header: {{customValue}}
```
### Request Body
For POST, PUT, and PATCH methods, configure the request body.
**Body types:**
The most common format for REST APIs.
```json theme={null}
{
"email": "{{userEmail}}",
"name": "{{userName}}",
"plan": "premium"
}
```
URL-encoded form data.
```
email={{userEmail}}&name={{userName}}&plan=premium
```
Plain text content.
```
Hello {{userName}}, your order {{orderId}} has shipped.
```
XML-formatted data.
```xml theme={null}
{{userEmail}}
{{userName}}
```
## Input Variables
Input variables make your HTTP Action dynamic. They use the `{{variableName}}` syntax and can appear in the URL, headers, and body.
### Auto-Detection
Click the **"Auto-detect"** button to scan your URL, headers, and body for `{{variableName}}` patterns. Detected variables are added to the input variables table automatically.
### Manual Addition
Click **"Add Variable"** to manually define an input variable with a name and type.
### Variable Types
| Type | Description | Example Value |
| ----------- | -------------- | ------------------ |
| **string** | Text values | `"usr_123"` |
| **number** | Numeric values | `42`, `99.99` |
| **boolean** | True/false | `true` |
| **object** | JSON objects | `{"key": "value"}` |
| **array** | JSON arrays | `["a", "b", "c"]` |
Type `{{` in any input field to open the variable picker. You can search and select from defined variables using keyboard navigation.
## Authentication
Configure how the action authenticates with the target API.
### None
No authentication headers are added.
### API Key
Sends an API key in a custom header.
| Field | Default | Description |
| ----------------- | ----------- | ---------------------------------------- |
| **Header Name** | `X-API-Key` | The header name for the key |
| **API Key Value** | — | The key value (supports input variables) |
### Bearer Token
Sends a Bearer token in the `Authorization` header.
| Field | Description |
| --------- | ------------------------------------------------- |
| **Token** | The bearer token value (supports input variables) |
Resulting header: `Authorization: Bearer `
### Basic Auth
Sends Base64-encoded credentials in the `Authorization` header.
| Field | Description |
| ------------ | ---------------------------------------- |
| **Username** | Auth username (supports input variables) |
| **Password** | Auth password (supports input variables) |
Auth credentials are stored with the action. Use input variables for credentials that change per-workflow (e.g., `{{apiKey}}`), and store sensitive values securely.
## Testing
The test panel lets you run the action with sample values before saving.
Enter sample values for each input variable in the test panel on the right side of the form.
Click **"Run Test"**. The action executes with your sample values and displays the response.
The test result shows:
* **Status** — HTTP status code (color-coded: green for 2xx, orange for 4xx, red for 5xx)
* **Duration** — Response time in milliseconds
* **Response Body** — Interactive JSON explorer
* **Headers** — Response headers
* **Mapped Outputs** — Values extracted by your output mappings
The JSON explorer in the response body is interactive — click the **"+"** button next to any value to create an output mapping for that path.
## Output Mappings
Output mappings extract specific values from the API response and expose them as named variables in workflows.
### Creating Output Mappings
After running a test, click the **"+"** button next to any value in the JSON response explorer. This creates a mapping with:
| Field | Description | Example |
| ----------------- | ------------------------------- | ------------------------ |
| **Output Name** | Variable name used in workflows | `userId` |
| **Response Path** | JSON path to the value | `body.data.id` |
| **Type** | Auto-detected data type | `string`, `number`, etc. |
### Accessing Outputs in Workflows
Once mapped, output values are available in downstream workflow steps as:
```
outputs.http.
```
For example, if you map an output named `customerId`, downstream steps can reference it as `outputs.http.customerId`.
Output mappings only work when the response structure matches the configured paths. Test thoroughly to ensure mappings extract the expected values.
## What's Next?
Add your HTTP Action to a workflow and map inputs and outputs.
Learn about inline HTTP requests for one-off API calls in workflows.
## Basic Info
Configure the action's name and description.
| Field | Required | Description |
| --------------- | -------- | ------------------------------------------------------------------------------ |
| **Name** | Yes | A descriptive name (e.g., "Create Stripe Customer", "Send Slack Notification") |
| **Description** | No | Brief explanation of what the action does |
## Request Configuration
### HTTP Method
Select the HTTP method:
* **GET** — Retrieve data
* **POST** — Create resources or send data
* **PUT** — Replace resources
* **PATCH** — Partially update resources
* **DELETE** — Remove resources
### URL
Enter the full endpoint URL. You can use input variables in the URL:
```
https://api.example.com/v1/users/{{userId}}/orders
```
### Headers
Add key-value header pairs. Both keys and values support input variables:
```
Authorization: Bearer {{apiToken}}
Content-Type: application/json
X-Custom-Header: {{customValue}}
```
### Request Body
For POST, PUT, and PATCH methods, configure the request body.
**Body types:**
The most common format for REST APIs.
```json theme={null}
{
"email": "{{userEmail}}",
"name": "{{userName}}",
"plan": "premium"
}
```
URL-encoded form data.
```
email={{userEmail}}&name={{userName}}&plan=premium
```
Plain text content.
```
Hello {{userName}}, your order {{orderId}} has shipped.
```
XML-formatted data.
```xml theme={null}
{{userEmail}}
{{userName}}
```
## Input Variables
Input variables make your HTTP Action dynamic. They use the `{{variableName}}` syntax and can appear in the URL, headers, and body.
### Auto-Detection
Click the **"Auto-detect"** button to scan your URL, headers, and body for `{{variableName}}` patterns. Detected variables are added to the input variables table automatically.
### Manual Addition
Click **"Add Variable"** to manually define an input variable with a name and type.
### Variable Types
| Type | Description | Example Value |
| ----------- | -------------- | ------------------ |
| **string** | Text values | `"usr_123"` |
| **number** | Numeric values | `42`, `99.99` |
| **boolean** | True/false | `true` |
| **object** | JSON objects | `{"key": "value"}` |
| **array** | JSON arrays | `["a", "b", "c"]` |
Type `{{` in any input field to open the variable picker. You can search and select from defined variables using keyboard navigation.
## Authentication
Configure how the action authenticates with the target API.
### None
No authentication headers are added.
### API Key
Sends an API key in a custom header.
| Field | Default | Description |
| ----------------- | ----------- | ---------------------------------------- |
| **Header Name** | `X-API-Key` | The header name for the key |
| **API Key Value** | — | The key value (supports input variables) |
### Bearer Token
Sends a Bearer token in the `Authorization` header.
| Field | Description |
| --------- | ------------------------------------------------- |
| **Token** | The bearer token value (supports input variables) |
Resulting header: `Authorization: Bearer `
### Basic Auth
Sends Base64-encoded credentials in the `Authorization` header.
| Field | Description |
| ------------ | ---------------------------------------- |
| **Username** | Auth username (supports input variables) |
| **Password** | Auth password (supports input variables) |
Auth credentials are stored with the action. Use input variables for credentials that change per-workflow (e.g., `{{apiKey}}`), and store sensitive values securely.
## Testing
The test panel lets you run the action with sample values before saving.
Enter sample values for each input variable in the test panel on the right side of the form.
Click **"Run Test"**. The action executes with your sample values and displays the response.
The test result shows:
* **Status** — HTTP status code (color-coded: green for 2xx, orange for 4xx, red for 5xx)
* **Duration** — Response time in milliseconds
* **Response Body** — Interactive JSON explorer
* **Headers** — Response headers
* **Mapped Outputs** — Values extracted by your output mappings
The JSON explorer in the response body is interactive — click the **"+"** button next to any value to create an output mapping for that path.
## Output Mappings
Output mappings extract specific values from the API response and expose them as named variables in workflows.
### Creating Output Mappings
After running a test, click the **"+"** button next to any value in the JSON response explorer. This creates a mapping with:
| Field | Description | Example |
| ----------------- | ------------------------------- | ------------------------ |
| **Output Name** | Variable name used in workflows | `userId` |
| **Response Path** | JSON path to the value | `body.data.id` |
| **Type** | Auto-detected data type | `string`, `number`, etc. |
### Accessing Outputs in Workflows
Once mapped, output values are available in downstream workflow steps as:
```
outputs.http.
```
For example, if you map an output named `customerId`, downstream steps can reference it as `outputs.http.customerId`.
Output mappings only work when the response structure matches the configured paths. Test thoroughly to ensure mappings extract the expected values.
## What's Next?
Add your HTTP Action to a workflow and map inputs and outputs.
Learn about inline HTTP requests for one-off API calls in workflows.